Category Archives: VPN

How to Protect Your Privacy When Playing Online Games

From MMORPGs to battle royale shooters, it’s fun and thrilling for gamers to immerse themselves in a digital world filled with millions of other players.

Once an online game reaches the highest level of popularity it becomes like a world of its own—with its economy, massive variety of items, and culture. And while most of the dangers and challenges are merely a part of the game, there are also real threats gamers need to protect themselves from.

Online privacy is a hot topic these days. When digital experiences provided by social media, games, and apps exploded in popularity your average person wasn’t ready for the privacy ramifications of it all.

Like most tech companies, gaming companies want to collect data about their customers to improve their games, to better understand what gamers want, and of course to increase profits by selling the data or using the data themselves.

Savvy gamers are now deciding for themselves how much data collection is too much. More than ever, gaming platforms like Steam, PSN, and Xbox Live are giving people the tools to protect their privacy and specify which data they’re comfortable sharing and which data they aren’t.

So, let’s dive in. Here are the things you can do to improve your privacy in online video games.

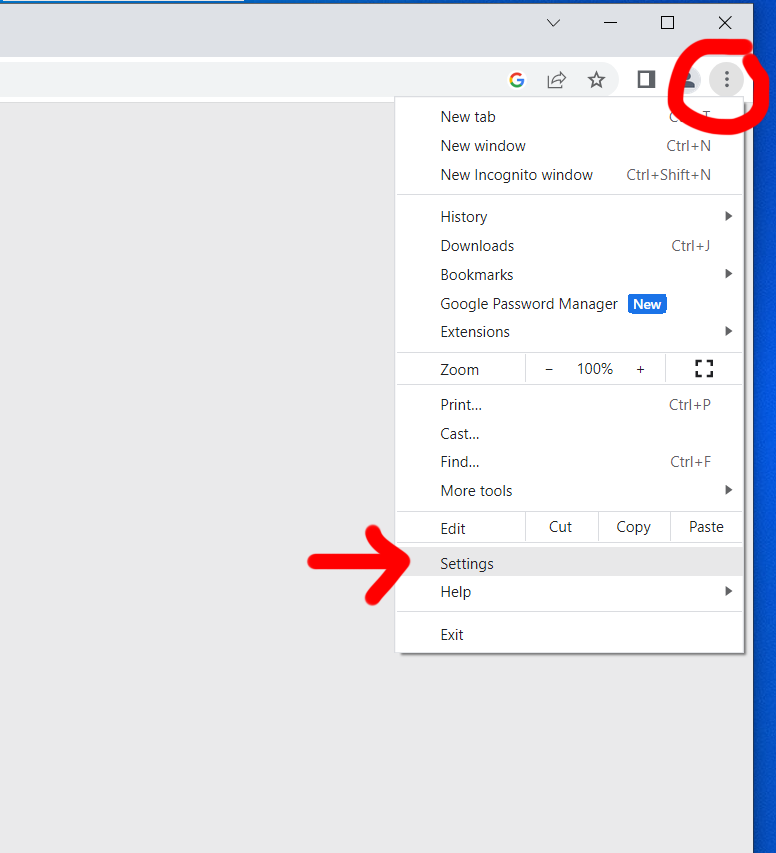
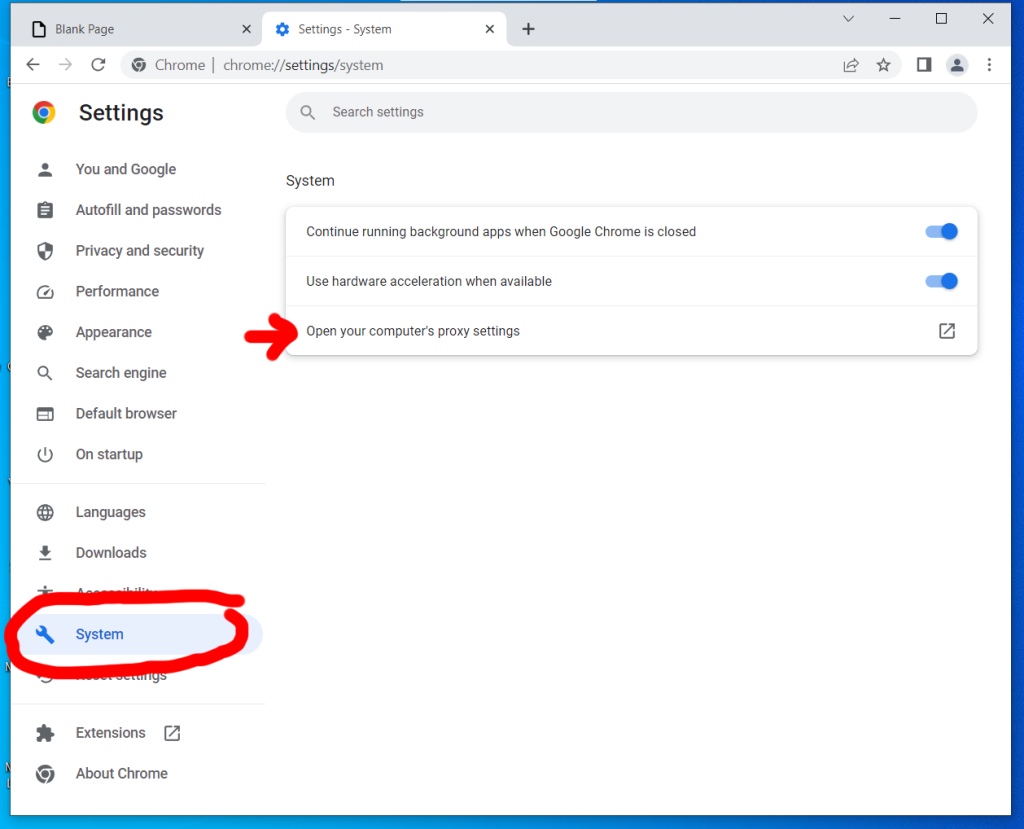
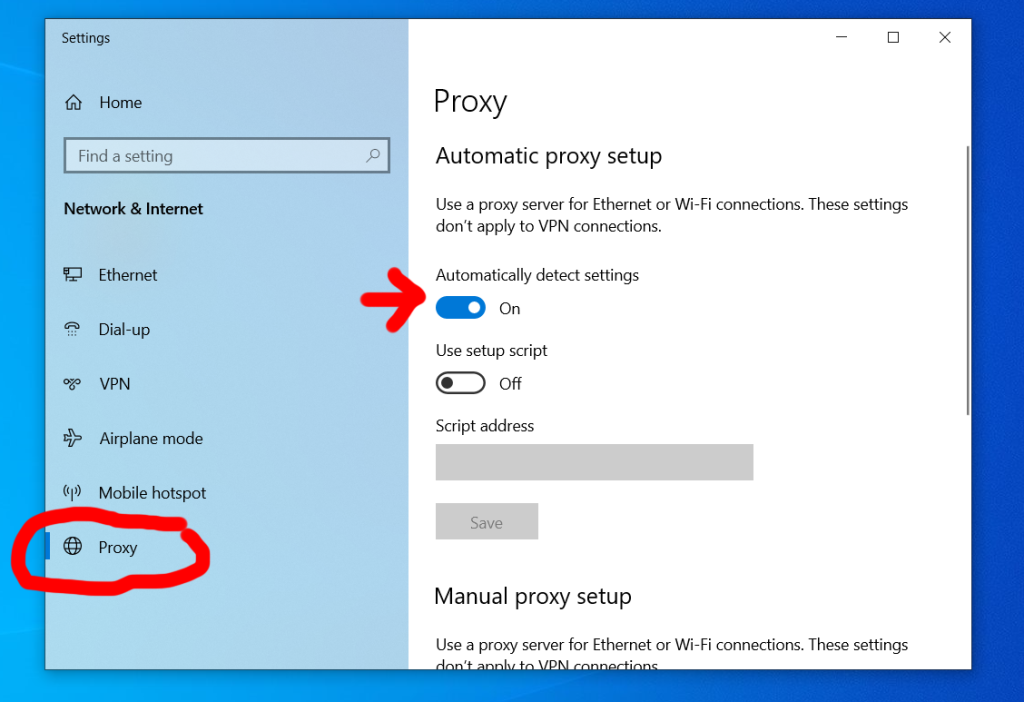
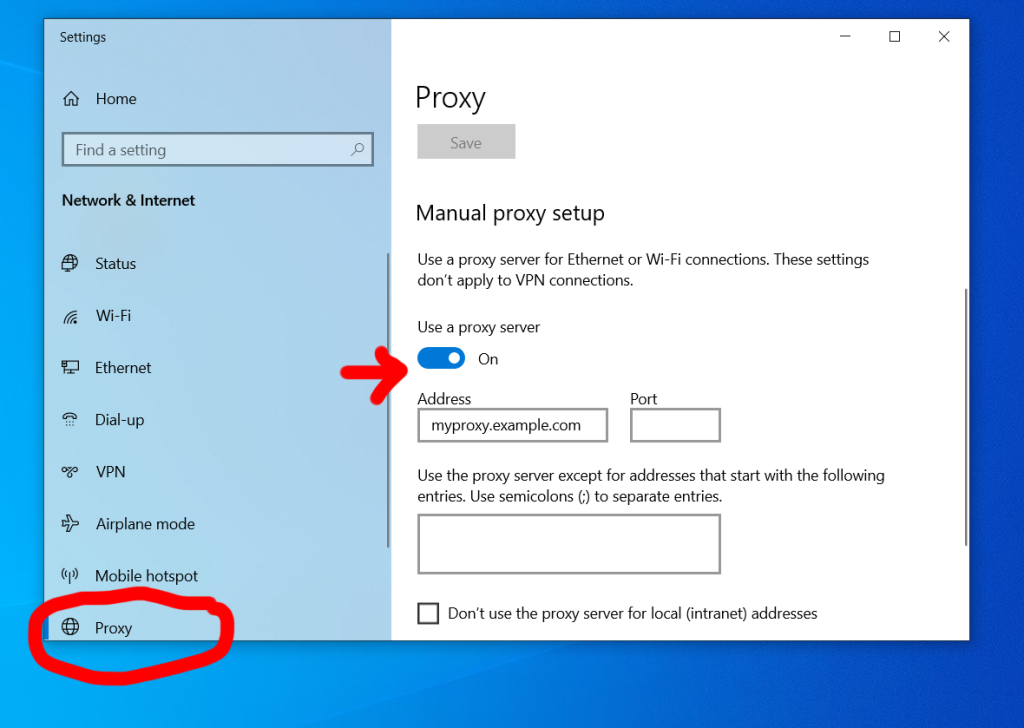
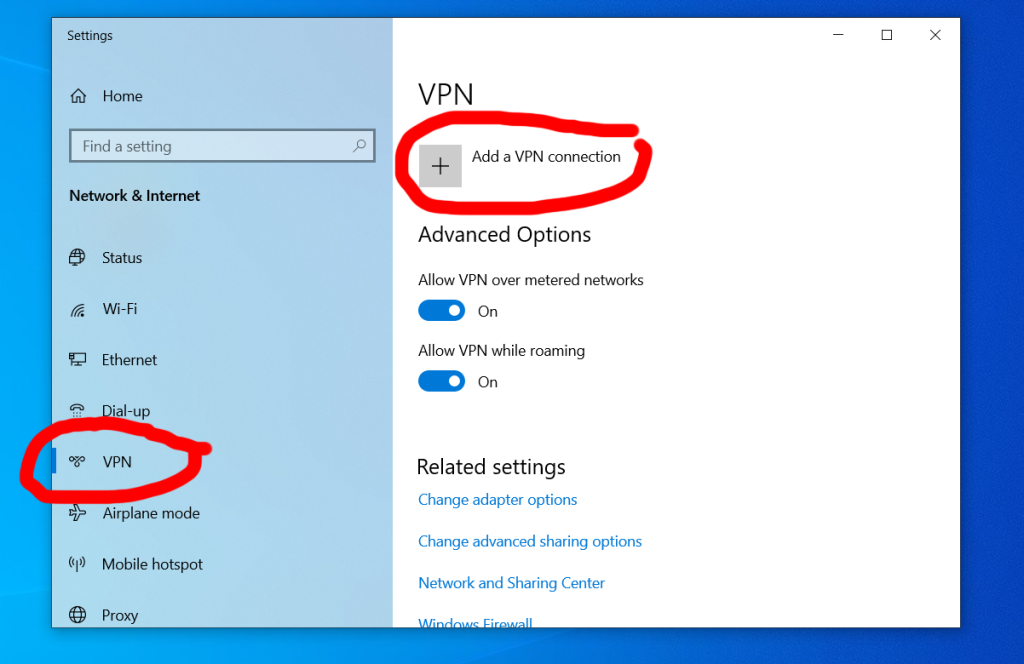
Tweak Your Privacy Settings

When it comes to privacy settings, there’s almost always room for improvement from the default settings.

You need to drill down into menus and sometimes make decisions that prioritize either privacy or features and convenience.

Thankfully, once you tackle it, you’re in good shape for years to come until the gaming platform you use overhauls its approach to managing privacy.

To learn how to tweak your game console settings, see LetMeBy’s guide to protecting your privacy on PS5 and protecting your privacy on Xbox Series X/S.

Unlink Your Social Media

Many big game companies such as Blizzard Entertainment and Bethesda Softworks allow their users to connect their social media accounts to their gaming accounts.

It might seem like an interesting feature to explore if you post content about gaming, but linking to social media may grant the game company access to parts of your personal data such as your name, profile photo, or even what you post and in-game conversations.

It’s almost always preferable to log in with a password specific to that gaming account rather than something like Facebook as there is typically a privacy cost.

Keep Your Antivirus Active and Up-to-Date

Good virus protection is always a must on Windows, but for avid online gamers, it’s even more essential.

Some gamers disable their antivirus software to play online or don’t protect their PC at all because they believe it affects performance. Studies have found that in four out of five cases there’s no reduction in frames-per-second (FPS) when playing games with security software running. And in the rare case it has an effect, it’s not a noticeable one.

The hurdle is antivirus software can sometimes launch automated actions that interfere with your gaming experience. Some examples of this are antivirus database updates, notifications of stopped threats, or scheduled hard drive scans.

Choose antivirus solutions that allow you to delay updates and scans while you play games. Some security software such as Kaspersky [Amazon] have a game mode to ensure it doesn’t start using system resources during an intense boss fight.

Manually Block Data Collection

The services that collect data about you during a gaming session are stealthy indeed. These processes take place in the background so you don’t ever notice them.

Windows users have the power to block servers from collecting data about them. Open up your hosts file and add the IP address and hostname associated with the service you want to block.

Managing these connections manually requires research and tech skills, but you can’t always achieve the desired effect from the game or platform privacy settings. At times it’s better to take matters into your own hands.

Don’t Save Your Credit Card Info

Gaming platforms and consoles make it easy for people to save their credit card info for future purchases. Simply put, it’s more likely you’ll make purchases if you can do it in a few clicks. And companies like getting those frictionless sales.

While it’s no doubt convenient to have your credit card on file, it has risks that come along with it. If somebody gains access to your account, they could manage to collect your credit card info or even make purchases.

More and more, credit card companies are requiring confirmation that changes to your card are genuine. However, it’s still best to play it safe and enter your card info each time you shop for new games.
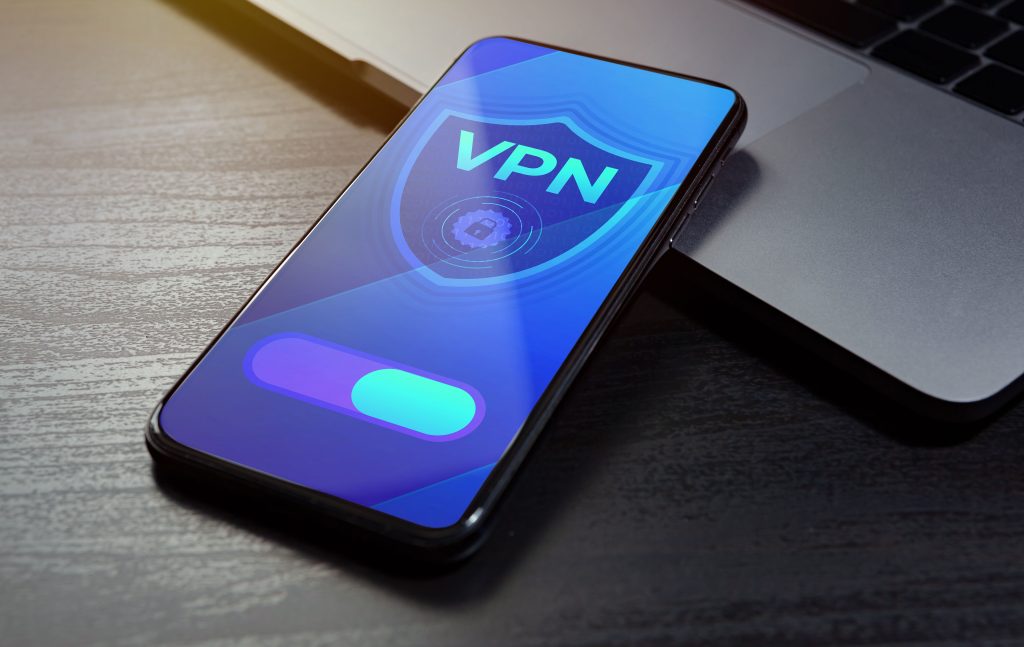
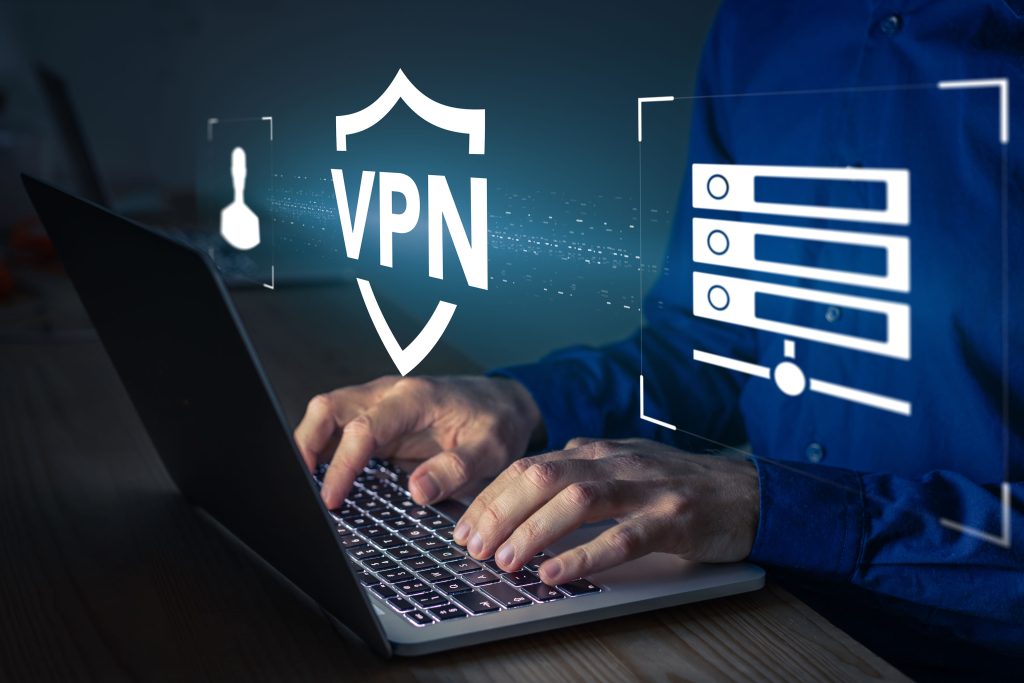
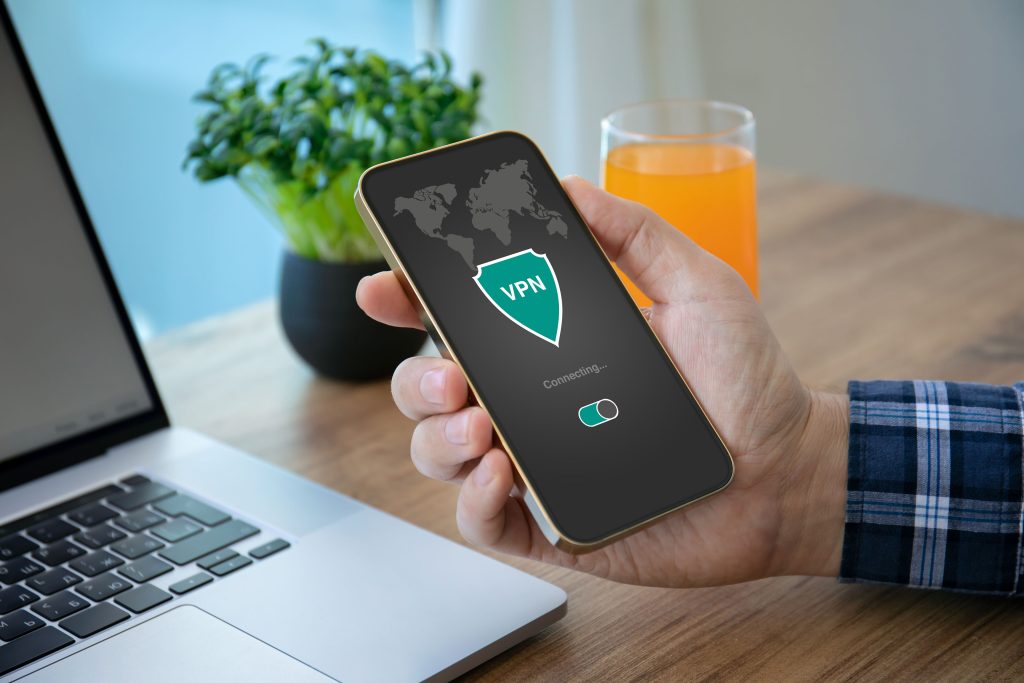
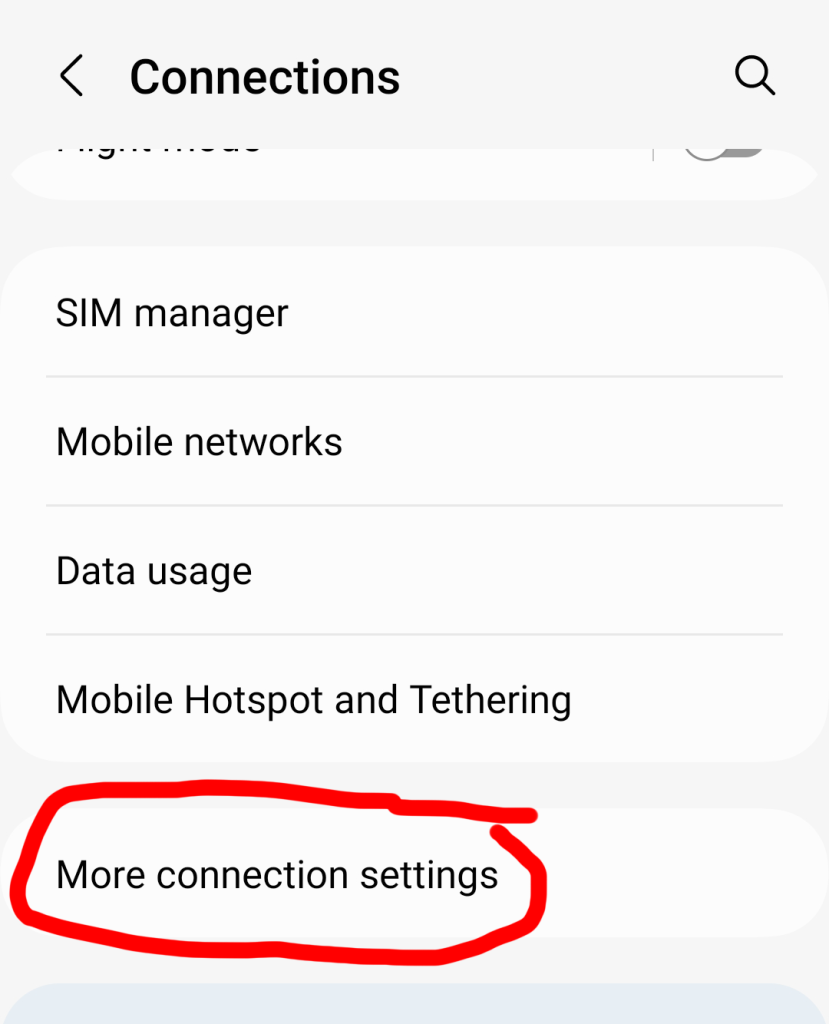
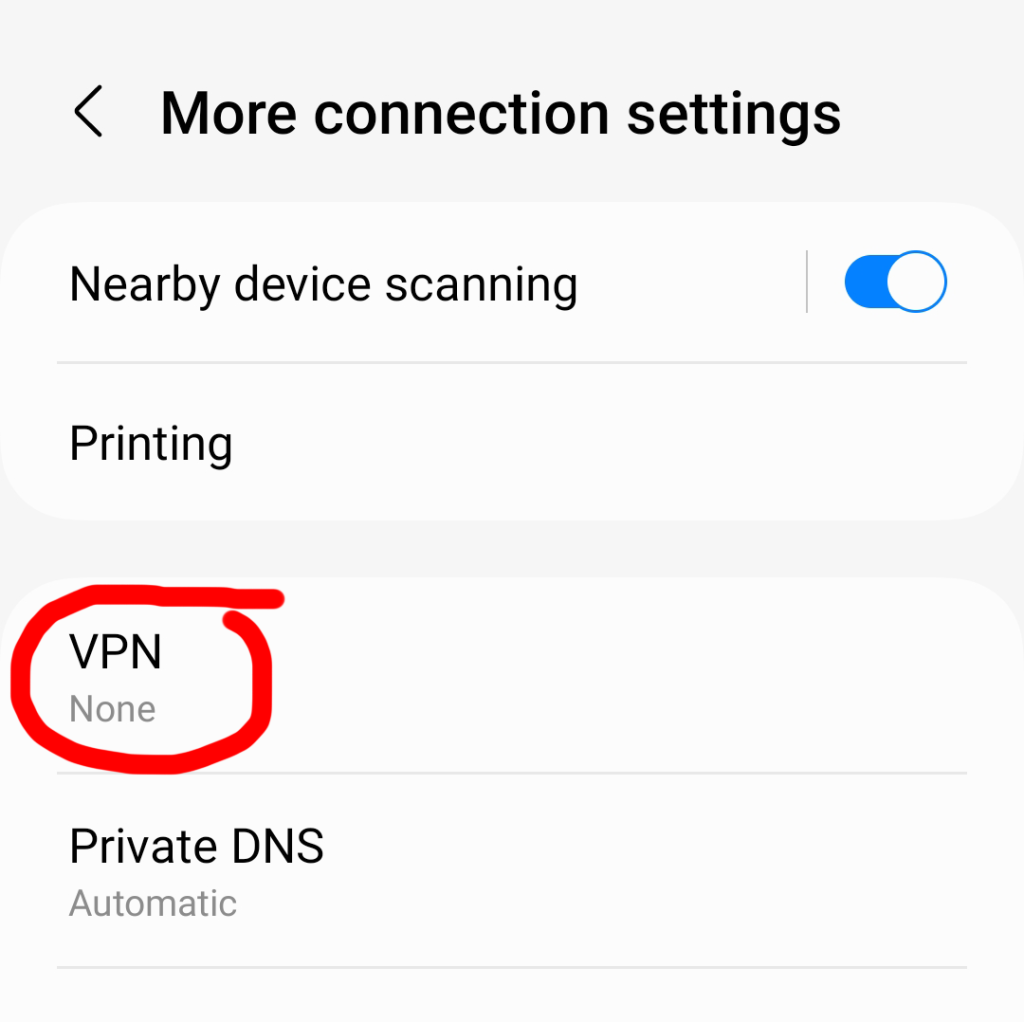
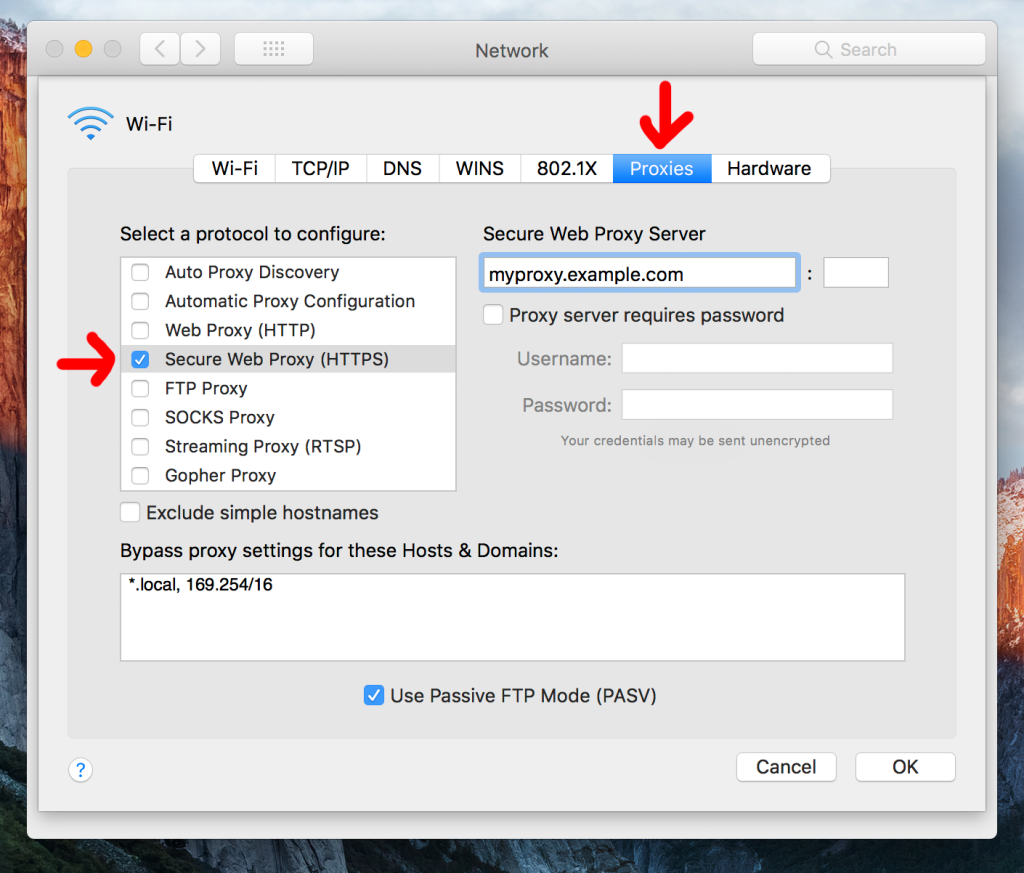
Use a VPN

VPNs create a secure tunnel in which all data flows between your internet connection and your gaming device.

Your real IP address is hidden and replaced with the IP associated with the VPN service. This makes it either difficult or impossible for companies and malicious users to pinpoint your location or gather data about you.

If you’re looking for a VPN, see LetMeBy’s top 3 VPN picks here. Alternatively, if you’re low on time, here are the VPNs most commonly recommended to gamers on this blog:

Avoid Using Cheats

Offering players cheats has become a common tactic used to trick unsuspecting gamers.

Here’s how it’s done.

Players looking for cheats and hacks will Google terms that bring them to an untrustworthy website. The site could use aggressive and misleading tactics to get players to click ads, complete surveys, or download malicious files.

Additionally, the cheat tool itself could use covert methods such as malware to obtain private data or it could use phishing to gain access to the gamer’s account.

Never download cheats as it not only goes against the terms of service in online games, it also puts your private data at risk. If you choose to download mods, do so from legit apps such as Steam or Epic Games and never from third-party websites.

Conclusion

Online gaming opens up incredible possibilities for players to compete and collaborate with other gamers, explore breathtaking environments, and acquire items that give their character a distinctive appearance.

It’s important to keep in mind that online games have greater risks as well.

There’s always a population of players looking for new ways to cheat and break the rules for their own gain. Online gaming has become so widespread that players are attractive targets for cybercriminals. On top of everything, many big gaming companies have become prying eyes.

Better online privacy doesn’t happen on its own. It’s something gamers need to strive for. And if you do, there’s a good chance your future self will thank you.

Brave Browser vs. Firefox: Which Is Best for Privacy?

First released in 2004, Firefox has long been an alternative for people who want to venture beyond the obvious web browser choices.

Firefox was once a popular browser, but its user base has largely moved on. In 2010, roughly 30% of internet users browsed with Firefox. Today, it’s dropped dramatically to under 3%.

Brave’s market share is much smaller than that with a mere 0.05% using it on desktop.

Right now, the vast majority are satisfied with what Apple, Google, and Microsoft have to offer.

There’s no doubt that Safari, Chrome, and Edge are capable. However, if you’re looking to level up your online privacy one of the first things to consider changing is your web browser. Mainstream browsers have many strengths and advantages, but top-tier privacy generally isn’t one of them.

Both Firefox and Brave put privacy front and center and use it to differentiate themselves from their much larger competitors.

Under the Hood

Before getting into the nitty gritty it’s helpful to know about the foundation these browsers are built on.

Brave is built on Chromium which is Google’s open-source browser. Thus, in terms of the technology that powers it, it has a lot more in common with Chrome than Firefox. Think of it like Chromium is the engine but its feature set is based on a philosophy that puts emphasis on user privacy.

Firefox is a unique platform and ecosystem developed by Mozilla. Web browsers that are developed from the ground up are a rarity. Many alternative browsers such as Opera are powered by Chromium. Also, typically browsers are built by corporations, but Firefox is made by a foundation. Mozilla is focused on principals such as keeping the internet open and accessible to all. Firefox is part of its family of products it calls “privacy-first.”

Now, let’s dig deeper into each browser’s privacy features and how they perform in the real world to determine which one is right for you.

Tracker Blocking

Brave features tracker blocking out of the box with ‘Brave Shields.’

In the browser, you can click the Brave logo to the right of the address bar to quickly view stats about blocked trackers and ads. This is a handy way to see how many trackers are on websites you frequently visit. A small number that specifies the number of trackers blocked also appears on top of the logo which is nice since it saves you a second or two.

Firefox for desktop has what it calls ‘Enhanced Tracking Protection.’

By clicking on the shield icon to the left of the address bar in Firefox you get a little report about known trackers on the websites you visit. At first glance, the presentation isn’t as slick as Brave’s. However, by clicking through to its ‘Protections Dashboard’ you’re greeted with a breakdown of all the types of trackers it blocked throughout the week.

Verdict: Tie

Brave and Firefox block trackers and cookies comprehensively. In fact, one Redditor tested them with d3ward’s website and Adblock Tester and both were given a score of 100%.

When Brave and Firefox’s websites get into the specifics of what’s blocked, they emphasize different things. For example, Brave optimizes scripts that can affect performance, and it catches third parties that use cloaking to try to bypass ad blockers.

Firefox pays special attention to social media trackers in its reports. It also blocks cryptomining which is malware nefarious websites use to employ their visitors’ computers to mine crypto for them.

Private Window

Often private window features are only for local privacy. In other words, they exclude websites you visited from your history when it’s enabled. Additionally, there aren’t other traces left over from browsing such as search bar entries, cookies, and cached files.

Brave goes a step beyond with its Private Window. Uniquely, it comes with two different variations. First, is its normal Private Window that stops sites from being added to the list in the History menu. Second, is its Private Window which uses Tor to hide your identity with incredible thoroughness. It does come at the cost of loading speed. So, it’s a tool you’ll only want to use when online anonymity is a critical factor.

Firefox has a Private Window feature that’s pretty much identical to the one found in mainstream browsers such as Chrome’s incognito mode. It performs its function of enhancing local privacy admirably. But it does nothing to boost your anonymity online versus regular browsing.

Verdict: Brave Wins

Brave’s ability to browse with Tor might go unnoticed by many, but it actually makes private browsing truly anonymous as the name implies. Tor offers its own browser as well but this is the perfect way for people to get their feet wet.

Fingerprinting

Many websites and online services use digital fingerprinting to identity devices. It gathers data about your operating system, browser, your hardware setup, screen resolution, etc. Some of these items may seem insignificant but when they’re all added together it’s a reliable way to pinpoint you.

Sites such as Cover Your Tracks and Browser Leaks will test your browser to see how big your digital footprint really is.

Brave did the best in tests since it dynamically changes fingerprint data to make it difficult or impossible to track its users. Essentially, the fingerprint data is there, but it’s useless to its recipients.

Firefox has a persistent fingerprint. Rebooting your system or relaunching your browser won’t improve matters.

Verdict: Brave Wins

VPN Features

Changing your browser is often the first step on the road towards better online privacy. Getting a VPN is the second.

VPNs sit between the internet and your device so true anonymity can be achieved. They offer the highest level of encryption so your location and actions can’t be tracked by companies and third parties.

Brave offers a paid VPN service called Brave VPN. It’s powered by Guardian and it protects five devices.

Firefox also has a VPN product called Mozilla VPN. It’s developed directly by Mozilla and like Brave’s offering, it can be installed on five devices.

Verdict: Tie

You can use any VPN service with Brave or Firefox. You merely have to install the associated VPN app to create a protected connection in any applications you use. If you’re interested in taking advantage of this feature, be sure to view the top 3 VPNs recommended by LetMeBy here.

Conclusion

Firefox and Brave are both excellent browsers that live up to their claims of putting privacy first. They are nearly neck and neck when it comes to their implementation of most privacy features. However, Brave has an edge due to its fingerprinting capabilities and integration of Tor in its Private Window.

Overall, Brave’s user experience feels a bit more modern. Firefox has kept up but its roots as a browser that’s been around since the mid-2000s are apparent in its user interface at times. Some may notice that Brave’s performance is snappy as it utilizes RAM very efficiently.

On the other side of the coin, Firefox is well-established and widely supported. It plays nice with pretty much any website.

Online Privacy Has Become “Very Creepy” Says Mozilla

If you ever felt we’ve come dangerously close to George Orwell’s dystopian vision in 1984, you’re on to something. Big Brother isn’t watching but the products we use every day and the companies behind them certainly are.

They’re best known for their web browser, Firefox, but Mozilla is also an online privacy watchdog. Since 2017 they’ve been reviewing products and assessing what data is collected and who it’s being shared with.

Their annual consumer Creep-O-Meter takes all those findings, distills them, and gives you a big-picture view of the current state of digital privacy and where we’re headed.

According to the oversized, shocked emoji on their site, things aren’t looking good. The state of digital privacy is “very creepy.”

The Good News: Online Security Has Improved

The report isn’t all doom and gloom.

More companies are using encryption and giving their customers automatic updates. So, while companies are hungry for personal data, and they’re typically sharing it to make additional revenue, the data is generally sent securely. That means it’s much harder for third parties to intercept personal data illegitimately.

It’s important to remember that companies might not always make decisions that put their customers first but they’re not the threat. Rather, consumers should be most concerned about nefarious third parties that steal private data.

The Bad: Long Privacy Policies and Products that Don’t Work Offline

If you’ve skipped privacy policies, skimmed others, and occasionally read sections of them, you’re in the majority.

Insanely long privacy policies that no human possibly has time to read are the norm. If you’re ambitious enough to go through one, the legal jargon and lack of clarity may give you just as many questions as answers.

A machine learning analysis found that since 1996 the typical privacy policy has grown to over 4,000 words.

Another growing trend is products that need an internet connection to operate, with no “offline mode.”

Devices use so many online services today that it’s tricky to give people a decent user experience without the internet. And since there isn’t much incentive for companies to offer the ability to go offline, many companies have given up on the idea.

Going offline is the simplest, most effective way to protect your private data. When apps and gadgets neither offer a way to use them offline nor manage privacy settings, customers are left with a choice: accept data practices they might not be comfortable with or stop using them entirely.

New Cars Are the Creepiest Products

Perhaps the biggest shocker of all is that 100% of car makers failed to pass Mozilla’s privacy test.

If you’re looking for car brands that are slightly less aggressive about collecting and using your personal data, you won’t find much. All the big auto manufacturers are practically moving in lockstep.

Nissan won for the highest creep factor. The Japan-based company collects data about “sexual activity, health diagnosis data, and genetic information” according to Mozilla.

And when it comes to overall privacy with the most room for improvement, Tesla took the cake. Tesla was given an “X” in every category in their report about the state of privacy in car brands.

Most Gadgets Have Mics and Cameras

Perhaps it’s just too tempting to harvest data about customers when all the tools are built right into the products. Over 90% of gadgets, apps, and cars have a mic, a camera, or both.

The products with the highest “creepiness” may surprise you. Gaming consoles, smart video doorbells, smart speakers, and GPS watches were common near the top of Mozilla’s “Privacy Not Included” list.

Video call apps such as Apple’s Facetime were some of the worst when it comes to data privacy policies.

Quick Tips to Take Control of Your Privacy

  • Opt-out: When you install apps, you could be given the opportunity to limit or stop data collection and sharing. If privacy settings are available, poke around and see if you can make changes that will improve your online privacy.
  • Check permissions and deny access as needed: Android and iOS allow you to manage which apps have access to your location, contacts, camera, etc. as well as in what circumstances they’re permitted to access them. It’s a good practice to review these permissions every now and again.
  • Clear private data companies have about you: Tech companies such as Google and Meta allow you to delete your personal data they store on their servers. If you continue to use their services, they’ll resume collecting data in most cases but at least you’ll start fresh.
  • Use a VPN: Add a layer of anonymity and encryption between your device and the internet with a virtual private network. It allows you to easily hide your IP address which is one of the key ways you are identified online. Learn about the top 3 VPN services here.
  • Delete apps you’re not using: It may be surprising to some, but apps you don’t even use can still collect data about you. Old apps that haven’t received security updates may contain personal information that is low-hanging fruit for data thieves.
  • Read the privacy policy: No, not the privacy policy, right? It might be duller reading material than the phonebook, but if you use an app or product every day it’s important to know how it handles your data.

Conclusion

The smart technology we have in our homes has added efficiency to our lives and connected us to the world, but it has its costs.

More than ever companies are using their products to collect and share the personal data of their customers. The big data industry provides lucrative opportunities to manufacturers. Tough economic times have corporations looking for alternative revenue sources.

Before you set up an “always on” device in your home such as a smart speaker or smart video doorbell, consider if the upside outweighs the downside. Products in certain categories have privacy drawbacks across the board.

How to Hide Your IP Address on Android

As VPNs have become widely used and smartphone processing power has exploded, Google has equipped Android with powerful VPN features.

Although there are apps that can hide your IP on Android, you can do the same thing right within the OS. Android has a built-in VPN client that supports many of the most popular VPN protocols.

This tutorial teaches you how to utilize a VPN service to mask your IP with no additional software.

Note that this guide was created using a Samsung smartphone. Your version of Android may look a bit different.

Step 1

Using a VPN has become the standard solution for anonymous browsing, making it next to impossible to trace activity back to your true IP address.

Before you get started with exploring the connection settings in Android, you need to have a VPN.

One of the first things to check is the VPN protocols supported by your version of Android. There’s a good chance it’ll be IKEv2/IPsec MSCHAPv2, IKEv2/IPsec PSK, and IKEv2/IPsec RSA. VPN technology is evolving quickly. Google moves to the fastest and most secure new protocols and leaves the rest behind.

Next, be sure that the VPN service you plan to use supports the same protocols as your version of Android.

I used a free VPN for testing purposes. And while free services can get the job done for light use, paid options are the fastest and offer superior security.

If you’re looking for a VPN, LetMeBy has reviewed the top 3 VPN services. Alternatively, if you’re in a hurry, here are the VPNs most commonly recommended on this blog:

Step 2

Locate “Settings” either by browsing your apps or by swiping down at the top of the screen to reveal the quick settings menu.

To access your settings from the quick settings menu, tap the cog icon at the top right of the screen.

Step 3

Now that the “Settings” menu has appeared, scroll down to “Connections” and tap it.

The options here control how you connect to the internet, connect to your mobile provider, Bluetooth devices, etc.

Step 4

Scroll down to “More connections settings” near the bottom. Tap it.

Step 5

In the “More connections settings” screen, go to “VPN.”

Step 6

If you’ve never set up a VPN before this screen will be mostly blank with text that says “No VPNs.”

Tap the icon at the top right that looks like three dots stacked on top of each other. Choose “Add VPN profile.”

Step 7

A new options screen called “Edit VPN network” will appear.

Give your VPN a name. Next, select a protocol that is supported by your VPN, and enter the server address.

Scroll down and enter the username and password provided to you by your VPN service provider.

Tap “Save” and test it to be sure you’ve connected to the internet through the VPN. You can open your web browser and visit What Is My IP Address to verify that your IP address has changed.

All Done

Congrats! Your IP is now hidden on Android!

How to Hide Your IP Address in Chrome

Ever wonder how it’s possible to hide your IP address? Technically, it isn’t. In order to hide your real IP, you must replace it with a different IP address.

To do this, you need to use a VPN or proxy server. Either one assigns your device with a new IP so nobody can see your true IP address online. And that’s the basic idea behind achieving anonymity in Chrome.

Unlike browsers like Firefox which allow you to enter settings proxy settings natively, Chrome refers you directly to your OS network settings. Thus, you actually have to change the settings in your operating system.

Whether you use Windows or a Mac, this guide has you covered.

Step 1

Locate the options icon to the far right of the Chrome browser window and click on it. The icon looks like three dots stacked on top of each other.

A pull-down menu will appear. Select “Settings” near the bottom.

Step 2

The settings page will appear directly in the browser window. On the left, you’ll see a tool icon with “System” next to it. Click it.

Step 3

Under the “System” settings you’ll see an option that says “Open your computer’s proxy settings.” Click it.

Step 4

In order to complete the next steps, you’ll need the info associated with your VPN or proxy server.

The VPN Route

VPN services provide you with a domain name or IP address, login, and password.

The Proxy Route

To use a proxy server, you need a domain or IP, and sometimes a login and password are required as well.

Which Should You Use?

Proxies and VPNs both hide your IP, but only a VPN will encrypt your data being sent and received from the internet.

If you’re looking for a VPN, check out LetMeBy’s reviews of the top VPN services. Or, scroll down to the list below for a quick peek. They’re all fast, inexpensive ($10/month or less), and highly recommended.

Recommended services:

Avoid free proxy services for anything other than testing. They’re almost always unusably slow. Plus, I wouldn’t trust my browsing data with most of the small operations offering it.

Step 5

Windows – Proxy

You’ll be directed to the “Proxy” menu under “Network & Internet” settings in Windows.

You can set up Windows to either detect your proxy settings automatically or you can enter your proxy manually.

To do it automatically, make sure “Automatically detect settings” is switched on. You’re good to go!

If you choose to do it manually, switch on “Use a proxy server” under “Manual proxy setup.” Enter your proxy server IP or domain name, plus the port number if required.

Note that Windows doesn’t support usernames and passwords for proxies out of the box. It requires you to create a two-step proxy in that circumstance which goes beyond the scope of this guide.

Windows – VPN

Click “VPN” at the left of the “Network & Internet” settings window.

Next, hit the plus (+) icon next to “Add a VPN connection.”

The VPN entry options will appear in the window. Enter the domain or IP, login, and password you were given by your VPN service provider.

Mac OS – Proxy

The “Network” window will appear with the “Proxies tab” selected. To use a proxy, check the box next to “Secure Web Proxy (HTTPS)” [preferable] or “Web Proxy (HTTP)” depending on the service.

Check the box next to “Proxy server requires password” and enter the login and password provided to you if it’s required.

Mac OS – VPN

Using a Mac with a VPN varies with different versions of Mac OS. Apple has done an excellent job of outlining the processes here.

Step 6

Congrats! You’re now ready to browse with your true IP hidden from prying eyes. Go back to Google Chrome and surf to your heart’s content.