
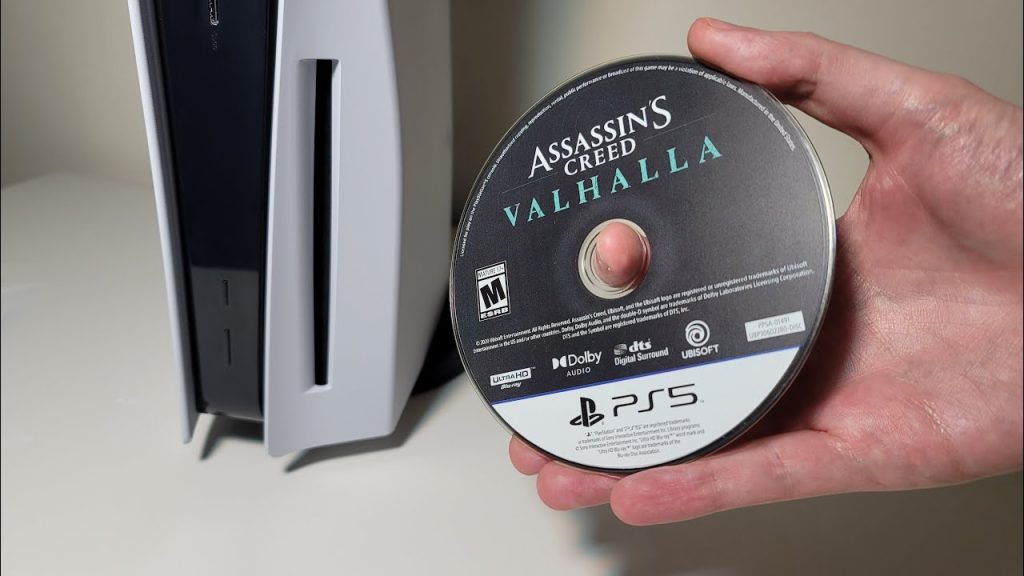
Who here remembers that game store experience?
For decades, buying a physical PlayStation game meant more than simply owning a disc, a case, and a manual. It meant you could walk into a store, pay with cash if you chose, take the game home, and play it without creating a detailed digital record of your purchase. It meant you could experience the best of the digital world through gaming while retaining the benefits of physical media.
That era of gaming is coming to an end.
Sony has announced that it will no longer produce physical first-party PlayStation games in the future, accelerating an industry-wide transition toward an all-digital ecosystem.
A post on Sony’s blog got right to the heart of the matter in the very first sentence:
As consumer preferences and the broader entertainment industry continue to shift away from physical discs to digital, physical game disc production for all new games releasing on PlayStation consoles will be discontinued starting January 2028.
While gamers know digital is dominant and collecting physical games has become a niche hobby, the announcement sparked strong reactions across Reddit, gaming forums, and social media. Players expressed concerns about ownership, game preservation, and the disappearance of consumer choice. While their physical collection isn’t going anywhere, many social media influencers mourned the loss of a future that gives gamers the option to continue adding new games to their shelf.
For privacy-conscious gamers, however, another issue deserves attention: the end of physical media also means the end of one of the few remaining ways to purchase and play modern games with minimal digital tracking.

Why Sony’s Decision Makes Business Sense
From Sony’s perspective, the move is good for business and reflects their ability to adapt as technology and consumer preferences shift.
Digital distribution eliminates the costs associated with manufacturing Blu-ray discs, printing packaging, shipping products around the world, and managing retail inventory. Every digital sale also allows Sony to avoid retailer commissions while keeping customers within the PlayStation Store ecosystem.
The added costs made sense when most people wanted physical discs, but in a world in which the majority want access to games instantly, it gets harder and harder to justify.
Technology has also evolved beyond what physical discs were originally designed to support.
Modern AAA games frequently exceed 100 GB, with some approaching or surpassing 200 GB once updates and downloadable content are included. Even when a game ships on disc, much of the experience often requires large downloads on launch day.
The reality is, the days of having a complete game on disc with no patches required to play hit the end of the road on PS2, GameCube, and the original Xbox.
The PlayStation 5’s ultra-fast SSD further changes the equation. Today’s games are increasingly designed around rapid data streaming that physical optical media simply cannot support. In many cases, the disc has become little more than a license key that initiates installation onto internal storage.
The Optical Disc Has Reached Its Limits
Physical media also faces a technological ceiling. When you consider that it all started with the LaserDisc in 1978 and then the Compact Disc in 1982, it’s astounding we’ve got this far.
Ultra HD Blu-ray remains the highest-capacity consumer optical format available, offering up to 100 GB on triple-layer discs. While researchers have demonstrated experimental optical storage technologies with significantly higher capacities, none have become commercially viable for mass-market game consoles.
Developing a new physical format would require enormous investment from hardware manufacturers, game publishers, and production facilities at a time when consumer demand is shifting toward digital downloads.
In other words, no obvious successor is waiting in the wings.
Without a compelling next-generation optical format, digital distribution is the only clear path forward.

Do You Really Own Your Digital Games?
One of the biggest areas of controversy surrounding digital-only game libraries is ownership.
When you buy a physical game, you own the disc. You can lend it to a friend, sell it, donate it, or keep it on your shelf indefinitely. Over the years, its value can decline or it can appreciate when collectors want to repurchase the games from their childhood.
Digital purchases work differently as they simply grant you access.
In most cases, you’re purchasing a license to access software under terms established by the platform holder. If licensing agreements change, games are removed from storefronts, or online services eventually shut down, there’s nothing you can do about it as a consumer. The game’s developer holds all the power. While it’s uncommon for purchased games to disappear without warning, digital ownership ultimately depends on the continued operation of online services and account access.
For many consumers, this distinction has become one of the defining debates of the digital era.

The Privacy Cost of an All-Digital Future
When the focus is put on privacy, the disappearance of physical games represents a much larger shift than simply changing how games are delivered.
Buying a physical game allows you to separate your purchase from your online identity. You can browse a store anonymously, pay with cash, and leave with relatively little personal information being collected.
You can opt to save by getting used games and give your business to brick and mortar stores, online retailers, or private sellers.
Digital purchases eliminate those options.
These days, tracking is a given when you deal with big corporations like Sony. Every purchase is connected to your PlayStation account. Data points such as payment method, IP address, purchase history, device identifiers, and various forms of usage data are gathered and stored.
Even if Sony collects this information responsibly, it makes some uneasy knowing one company knows so much about them.
Records can reveal:
- The genres you play most often.
- How frequently you purchase games.
- When you play.
- Which subscriptions you maintain.
- How much you spend.
- The digital communities you participate in.
Many gamers are fine with making this trade-off in exchange for convenience. Others appreciate the fact that using physical discs minimizes the amount of personal data that is tied to their entertainment habits.
As physical media disappears, so do the privacy benefits it gives us.
Privacy advocates have long encouraged reducing unnecessary digital footprints whenever practical. Physical media naturally supported that philosophy by allowing many purchases to occur outside online ecosystems.
An all-digital future makes maintaining that level of privacy considerably more difficult or impossible.
Will the PlayStation 6 Include a Disc Drive?
As Sony hasn’t officially revealed the PS6’s design, we only have rumors and reports from industry analysts to go on.
However, Sony’s announcement regarding phasing out physical media has made it clear that if a disc drive were offered, its purpose would be to support backward compatibility. Current gaming industry trends suggest that physical media will continue to decline. The PlayStation 5 already offers a Digital Edition without an optical drive, while the PlayStation 5 Pro requires buyers to purchase a disc drive separately.
Whether the PS6 has an optional drive, a detachable drive, or abandons discs entirely remains to be seen. Regardless of the hardware configuration, digital distribution is destined to become the way most players acquire new games.

How Physical Media Collectors May Adapt
From a collector’s perspective, the joy of displaying your favorite games on the shelf is far from over. Collectors have weathered similar transitions before.
Vinyl records survived streaming.
Printed books continue to thrive alongside e-books.
Film enthusiasts still collect Blu-rays despite the rise of streaming services.
Gaming collectors will adapt in similar ways.
Many will continue building libraries of PlayStation 4 and PlayStation 5 physical releases, especially limited editions and titles that receive complete on-disc releases. Others may focus on collecting retro consoles, cartridges, boxed games, or special editions that offer lasting historical and nostalgic value.
The fact that every PS1 and PS2 title has the complete game on disc and requires no patches or DLC is sure to be appreciated by enthusiasts when current games are all-digital.
The disappearance of physical media may make existing collections even more desirable over time. PlayStation discs will see an overall boost in scarcity as the years go by that will impact already harder-to-find titles. For the most part though, AAA titles and first-party games will remain abundant, making it easy for new collectors to climb aboard.
Collectors may also place greater emphasis on preserving discs, cases, manuals, and artwork as new games become downloads exclusively rather than tangible products.

Conclusion
Sony’s move away from physical PlayStation games reflects broader technological and economic realities. Digital distribution is cheaper, more efficient, and better aligned with modern hardware.
For many gamers, the transition to digital is already behind them.
For privacy-conscious players and collectors, it represents something more significant.
Physical games have long offered one of the last opportunities to participate in modern gaming while limiting the amount of personal information tied to every purchase. As discs disappear, so too does an important layer of anonymity.
The future of gaming is almost certainly digital. But as that future arrives, consumers should recognize that convenience often comes with a cost. Physical games are not just about ownership, but about limiting the personal data that is gathered about them.