
Ever wonder how it’s possible to hide your IP address? Technically, it isn’t. In order to hide your real IP, you must replace it with a different IP address.
To do this, you need to use a VPN or proxy server. Either one assigns your device with a new IP so nobody can see your true IP address online. And that’s the basic idea behind achieving anonymity in Chrome.
Unlike browsers like Firefox which allow you to enter settings proxy settings natively, Chrome refers you directly to your OS network settings. Thus, you actually have to change the settings in your operating system.
Whether you use Windows or a Mac, this guide has you covered.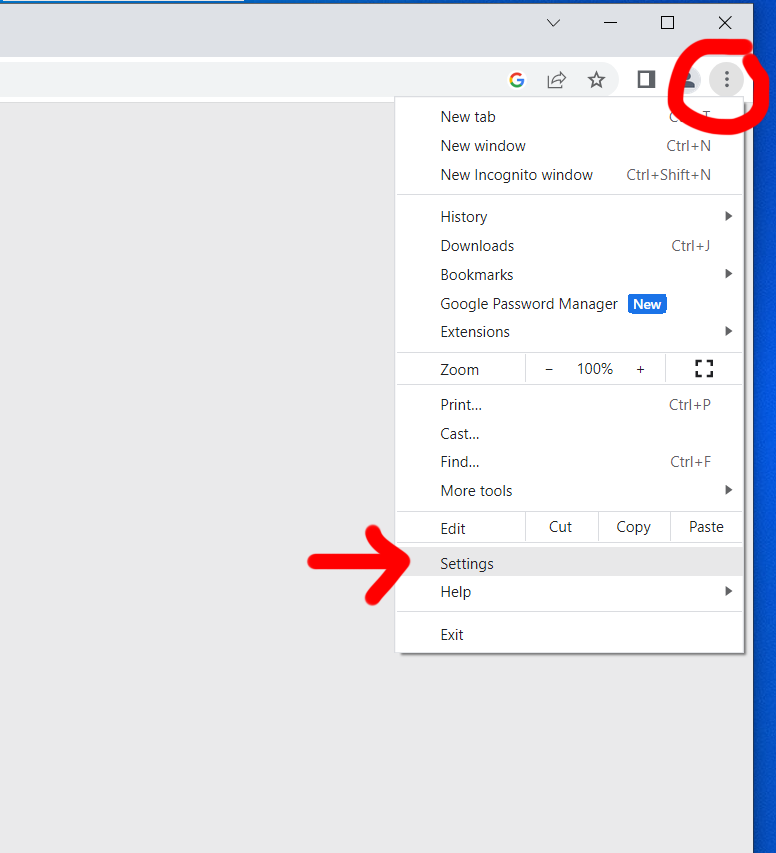
Step 1
Locate the options icon to the far right of the Chrome browser window and click on it. The icon looks like three dots stacked on top of each other.
A pull-down menu will appear. Select “Settings” near the bottom.
Step 2
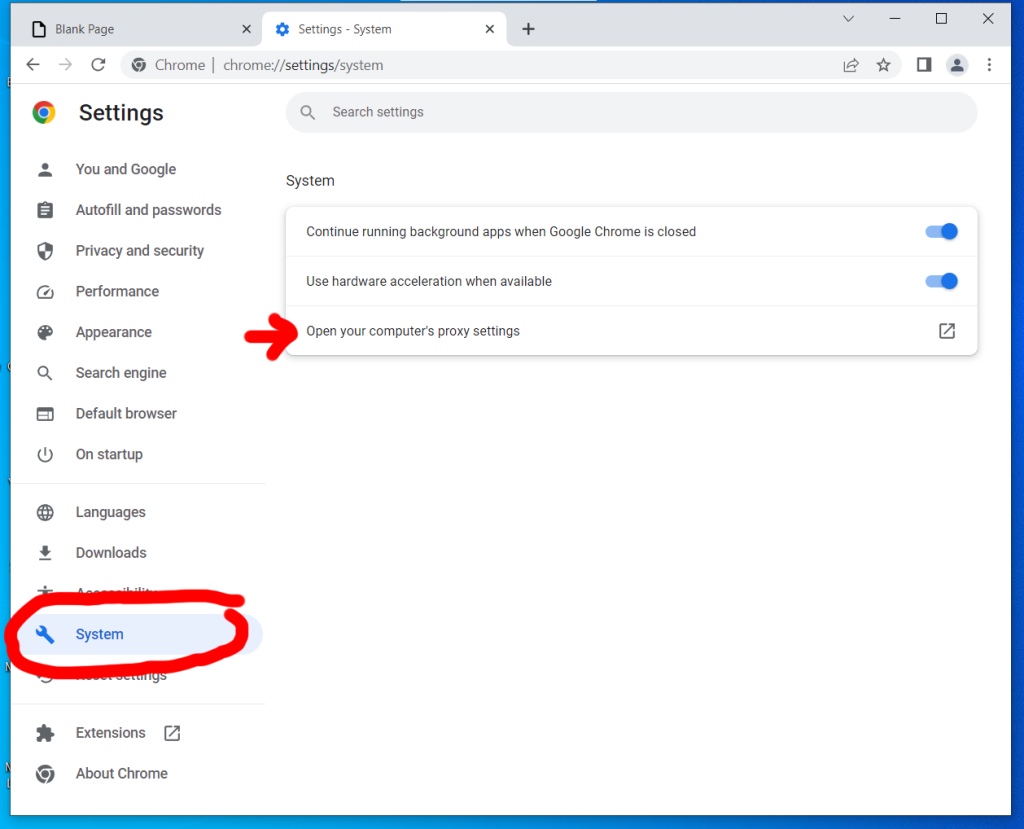
The settings page will appear directly in the browser window. On the left, you’ll see a tool icon with “System” next to it. Click it.
Step 3
Under the “System” settings you’ll see an option that says “Open your computer’s proxy settings.” Click it.
Step 4
In order to complete the next steps, you’ll need the info associated with your VPN or proxy server.
The VPN Route
VPN services provide you with a domain name or IP address, login, and password.
The Proxy Route
To use a proxy server, you need a domain or IP, and sometimes a login and password are required as well.

Which Should You Use?
Proxies and VPNs both hide your IP, but only a VPN will encrypt your data being sent and received from the internet.
If you’re looking for a VPN, check out LetMeBy’s reviews of the top VPN services. Or, scroll down to the list below for a quick peek. They’re all fast, inexpensive ($10/month or less), and highly recommended.
Recommended services:
Avoid free proxy services for anything other than testing. They’re almost always unusably slow. Plus, I wouldn’t trust my browsing data with most of the small operations offering it.
Step 5
Windows – Proxy
You’ll be directed to the “Proxy” menu under “Network & Internet” settings in Windows.
You can set up Windows to either detect your proxy settings automatically or you can enter your proxy manually.
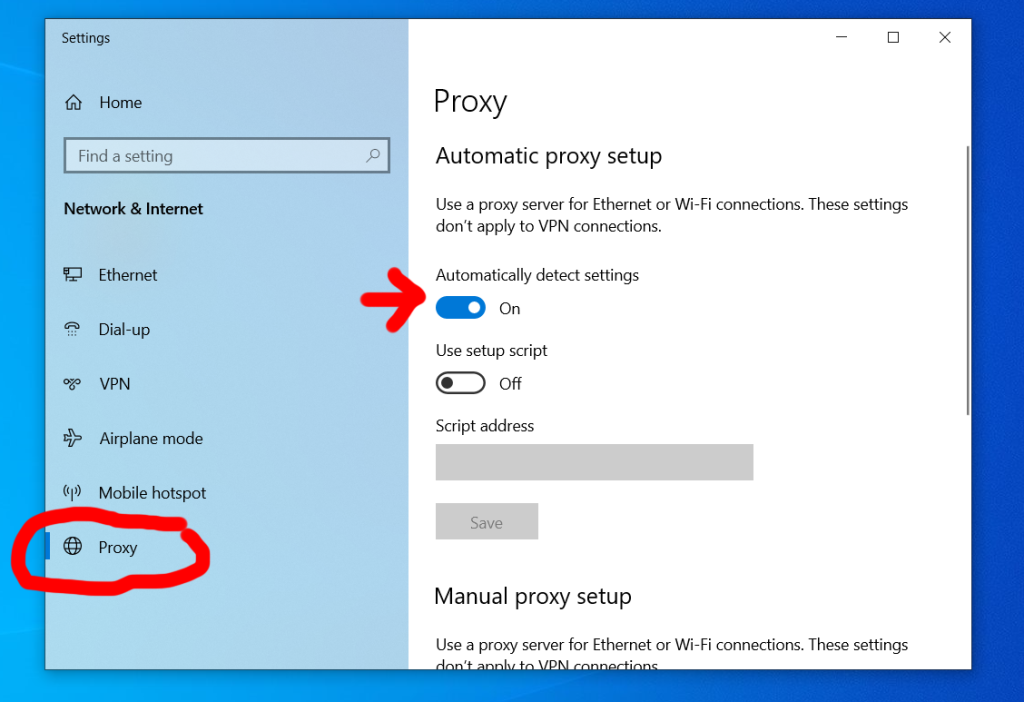
To do it automatically, make sure “Automatically detect settings” is switched on. You’re good to go!
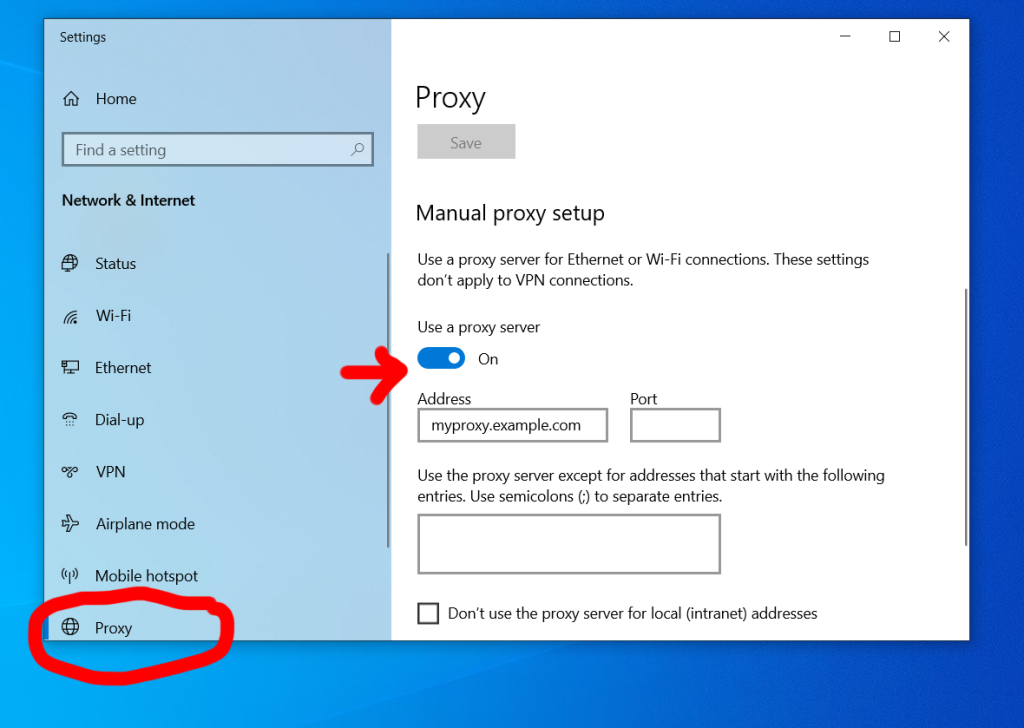
If you choose to do it manually, switch on “Use a proxy server” under “Manual proxy setup.” Enter your proxy server IP or domain name, plus the port number if required.
Note that Windows doesn’t support usernames and passwords for proxies out of the box. It requires you to create a two-step proxy in that circumstance which goes beyond the scope of this guide.
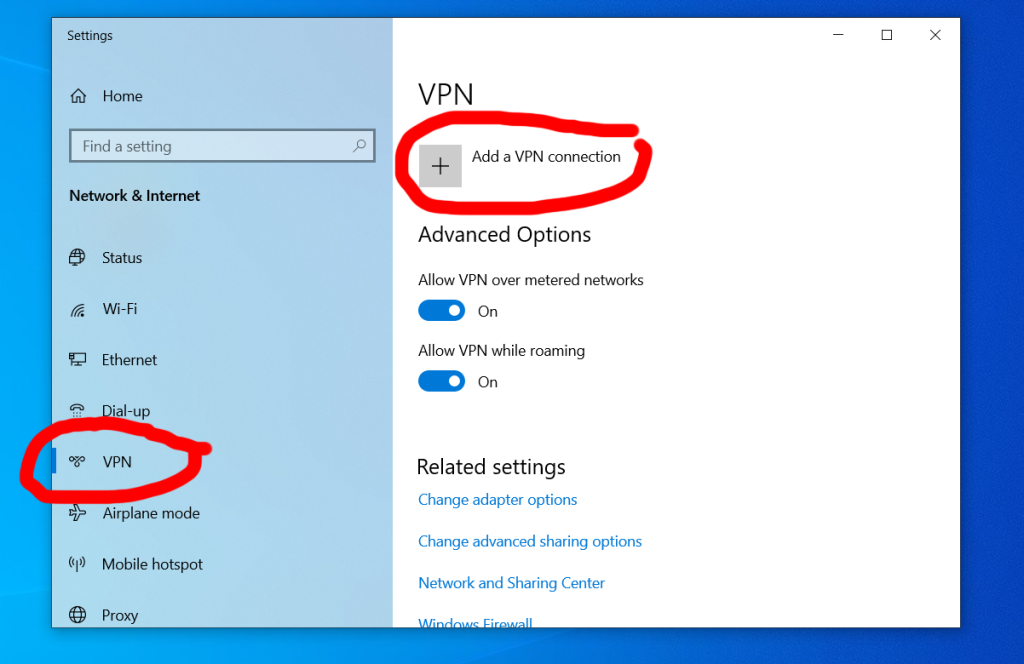
Windows – VPN
Click “VPN” at the left of the “Network & Internet” settings window.
Next, hit the plus (+) icon next to “Add a VPN connection.”
The VPN entry options will appear in the window. Enter the domain or IP, login, and password you were given by your VPN service provider.
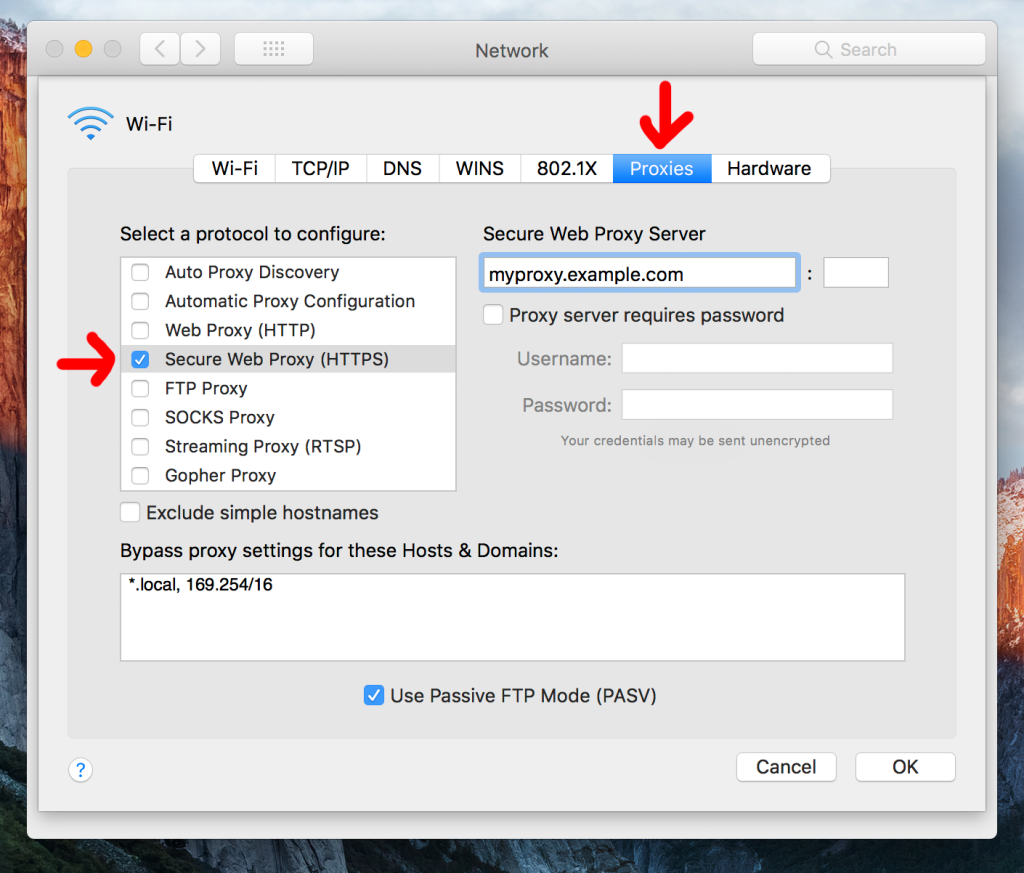
Mac OS – Proxy
The “Network” window will appear with the “Proxies tab” selected. To use a proxy, check the box next to “Secure Web Proxy (HTTPS)” [preferable] or “Web Proxy (HTTP)” depending on the service.
Check the box next to “Proxy server requires password” and enter the login and password provided to you if it’s required.
Mac OS – VPN
Using a Mac with a VPN varies with different versions of Mac OS. Apple has done an excellent job of outlining the processes here.

Step 6
Congrats! You’re now ready to browse with your true IP hidden from prying eyes. Go back to Google Chrome and surf to your heart’s content.